 |
 |
 |
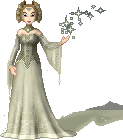
| 1. Start with the completed doll that you want to add the background to. |
2. Creare a new below your doll by going to Layer/New Raster Layer... or clicking on the new raster layer icon on the Layer Palette. Call the new layer Sky. When created, drag it down below your doll on the layer palette. | 3. Select the Preset Shape Tool |
 |
 |
 |
|
4. Select the Ellipse. Put a tick in the Create as Vector box & take the tick out of Antialis.
We don't need to worry too much about the other settings - we're just going to use this shape as a template for the sky. |
5. Draw an ellipse behind the doll.
You'll see that it will be placed on a new layer, Vector 1 on your layers palette. This is fine. |
6. Resize & move the ellipse until you are happy with it. The bottom should be just below your dolls feet. |
 |
 |
 |
|
7. Click on the Magic Wand selection tool.
Ensure Feather is set to 0 & Antialias is not checked. Click inside the ellipse to select it. |
8. Hide the Vector layer on the layer's palette.
Go the the layer named Sky |
9. Click on the Flood Fill tool.
On the Material's Palette, change the Forground to Gradient. Select the gradient your want to use or create your own (this tutorial is for Paint Shop Pro 7, but it will work on 8). Ensure the linear gradient is selected, as shown above. |
 |
 |
 |
|
10. Fill the Elliptical selection on the Sky layer with your gradient.
Press CTRL+D to drop the selection. |
11. Create a new layer above the Sky layer called Ground |
12. Set your Foreground colour to a dark shade of the colour you want your skirt to be. (remember to take it off Gradient!)
Make sure your Paintbrush is 1 pixel in size. Start by drawing a line where you want the horizon to be. |
 |
 |
 |
|
13. Using this line as your reference point, draw in the grass (I'm making grass! You can make other ground coverings, the principle is the same).
Don't worry about how messy it looks, we'll neaten it up later. |
14. We've got the basics down. Now we get to add details!
My favorite thing to do is stars. Love them. So, we're going to add some stars! Create a new layer above your sky layer called Stars |
15. Set your foreground colour to white or a very light shade of your background.
Using the Paintbrush, set the Size to 3 & the Hardness to 0. Dot some stars around the background. Decrease the Size down to 1 and add some more to add depth. Altering the Opacity of the brush while doing this looks good too. |
 |
 |
 |
|
16. Now, here's the clever bit.
Click on the Smudge brush. Set the Size to 1, the Step to 0 & the Opacity to about 70. Click in the centre of one of your stars. Hold down the SHIFT key & click again, about 5 pixels above the centre of the star. Your should get a nice little "light ray" effect happening. |
17. Repeat this on the bottom, left and right of your star.
Add this effect to as many stars as you like! |
18. If you like the way the ellipse is now, you can ignore this step.
Otherwise, click on the Eraser. Set the Size to 1 & Opacity to 100%. Delete bits from the edge of the sky layer in an intersting & arty way! |
 |
 |
 |
|
19. Go back to your grass layer.
Select the Airbrush. Set the Size to about 10, the Hardness to about 90, the Density to about 10 & the Opacity to about 90. Set your foreground to a darker shade of the ground colour & use the Airbrush to add some texture. |
20. Select a lighter colour and add some texture to the front of the ground.
Continue in this way until you are happy with how the ground looks. If you want to, add a layer above the base and add some "grass" to it, to cover the feet! |
21. Repeat what we did in step 18 to the sky to the ground. |
 |
 |
|
|
22. We're almost finished! We now need to save your doll as a gif.
Because of the gradient, we have to be careful that the gif monster doesn't eat it too badly. Save this doll. Press SHIFT+D to duplicate the image. Close the original. Fill the background with a colour that's not used anywhere on your doll. |
23. Go to Image/Decrease Color Depth/256 Colors (8 bit) (I don't know why, but this way always seems to work better than saving as a gift first).
Ok the warning about flattening the layers - that's why we're working on a duplicate. Use the settings shown above. |
|
 |
||
| 24. Go to File/Export/Gif Optimizer... |
25. Under the Transparency tab, select Areas that match this colour and set it to the background of your doll.
On the Colors tab, ensure 256 colours is selected. You don't need to worry about the other settings as we're already optimised the image. Save the doll. |
|
 |
||
| Your background is finished! | ||
| << back to tutorials | ||
 dolls
dolls  bases
bases  resources
  tutorials
  contest
  links
links  doll maker
  faq
faq  about
about  forum
forum  guestbook

