 |
 |
 |
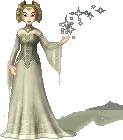
| 1. Open up your doll with the semi-transparent elements that you want to save as a transparent gif. |
2. When you save an image as a transparent gif, what you are doing is specifying 1 colour from the palette to appear transparent. None of the image formats currently available for on-line use support semi-transparency, so you have to be a little sneaky & find a way around this.
How can your tell if something is transparent? You can see through it. |
3. We use this fact to make solid coloured pixels appear semi-transparent. On our doll in Paint Shop Pro, we merge the semi-transparent layer with a layer of solid colour that will match your pages background. This gives a composite colour & the illusion of transparency.
Take the above image as an example. We interpret it as 2 semi-transparent circles overlapping, but what it actually is, if you think about it, is 3 shapes - a blue shape, a greenish shape & a yellow shape. |
 |
 |
 |
| 4. So, back to your doll. We are going to be merging layers, so I highly recommend saving the original, unmerged image, then pressing CTRL+D to duplicate the image & then work on the duplicate. | 5. Now, hopefully, if you've followed by preparing your base tutorial, you should have a plain background layer underneath your doll. |
6. Set your Foreground colour to the background colour of your webpage (or wherever you are going to display your doll). Use the Flood Fill tool to fill the background with this colour.
Why is it so important for the background colour to match the page the doll will be displayed on? |
 |
 |
 |
| 7. On the Layer Palette, right-click on any of the layers & select Merge/Merge All (Flatten). You'll be left with just a single merged background layer. |
8. Set your Foreground colour to a shade that is not on your image. I usually use the very bright green #00FF00.
Use the Flood Fill & Paintbrush tools to fill the whole of the background & any little nooks & crannies. Basically, everything you put in this colour will end up being transparent. |
9. Go to File/Export/GIF Optimizer...
Under the Transparency tab, select Areas that match this colour. You may need to increase the Tolerance, keep an eye on the preview image. |
 |
||
|
10. If you have followed this tutorial, you shouldn't need to worry about the Partial Transparency tab.
Click on the Colors tab & choose 256 colours & Optimised Octree. Keep an eye on your doll in the preview box to make sure you're happy with it. |
11. Click on OK then save your doll. |
|
 |
||
| You are left with a lovely transparent doll! | ||
| << back to tutorials | ||
 dolls
dolls  bases
bases  resources
  tutorials
  contest
  links
links  doll maker
  faq
faq  about
about  forum
forum  guestbook

