| Colourising without Filters |
||
Colourise |
||
 |
 |
 |
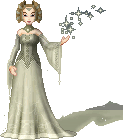
| 1. Open the base you want to colourise. If I'm going to change the colour of the base, I always make sure that it has a face (or at least nose and lips) so that the features have the same colour tones. You can always go over them later if they don't look quite right. | 2. There are a lot of tools for you to use within Paint Shop Pro to change the colour of your base. The most obvious is the Colorize option. Go to Colors/Colorize... The Hue is the actually colour and the Saturation is the amount. If the Saturation is set to 0, the base will be grey, if it's set to 255 it will be a strong shade of the Hue. |
3. & you have a lovely colourised base. You may want to go over areas of the face (like eyes and lips) to make the a more normal shade! |
Hue/Saturation/Lightness |
||
 |
 |
 |
| 1. For a greater range & more control over the colours, you may want to try Hue/Saturation/Lightness. Go to Colors/Adjust/Hue/Saturation/Lightness or press SHIFT+H on your keyboard. | 2. The top slider governs the colour or Hue. The left slider governs the amount of colour. The right slider governs the lightness/darkness of the image. Generally, you want to keep the left slider and right slider around the middle... |
3. ...Or else you could end up with something quite nasty!
This tool does require some experimentation, but it can be very useful for colourising everything from bases to hair to clothes. |
Highlight/Midtone/Shadow |
||
 |
 |
 |
| 1. If you're just looking for a different skintone rather than a different colour, Hightlight/Midtone/Shadow is a good option to play with. Go to Colours/Adjust/Highlight/Midtone/Shadow or press SHIFT+M on your keyboard. | 2. Keep Highlight quite high & Midtone around the middle & then increase the Shadow to give a more "tanned" appearance to the base. When I apply the settings: Shadow = 57 Midtone = 70 Highlight = 100 to the above base... |
3. ... I get this result. |
Gamma Correction |
||
 |
 |
 |
| 1. Another way to adjust the skintone is to go to Colors/Adjust/Gamma Correction. | 2. To put it simply, if you move the sliders to the left, the image is made darker... | 3. ...& if you move them to the right, the image is made lighter. |
Brightness/Contrast |
||
 |
 |
 |
| 1. A more reliable way to make the skintone lighter is to go to Colors/Brightness/Contrast or press SHIFT+B on your keyboard. | 2. The best thing to do is move the sliders a little at a time to balance out the brightness vs the contrast. The actual setting you use with vary depending on the original base colour, but generally speaking, to make a base darker, slide the Brightness & Contrast towards the left & to make a base lighter, slide the Brightness to the right & the Contrast to the left. | 3. Be careful not to over-do it as it can end up making the base look quite terrible! |
| Colourising with Filters |
||
| If you want to try something other than Paint Shop Pro, you can use my old favourite Harry's Filters. It has an entire section dedicated to colour. These are some of my favourite filters out of the pack. I have not shown the preview screens in the screenshots as they take up a little too much space. | ||
Col@ize |
||
 |
 |
 |
| 1. Go to Effects/Plug-in Filters/Harry's Filters From the first drop down menu, select Color and from the second Col@rize. |
2. Red, Green, Blue are fairly self-explanatory (although on some version of this filter, the blue & green sliders are labelled incorrectly) Blend is how much the colour takes on the shades on the original base. Similar the the Saturation option in PSP Colourise filter, only this does not greyscale the base if it's set low, it will just be very similar to the original base colour. This make it a particularly useful filter if you only want a hint of colour. Brightness is how bright the image should be. |
3. Of course, the best thing about Harry's Filters is the randomise button! Go on, you know you want to :) |
Expose |
||
 |
 |
 |
| 1. If you want a more normal skin tone, Harry can help. Go to Effects/Plug-in Filters/Harry's Filters From the first drop down menu, select Color and from the second Expose. |
2. Move the slider towards the left to make the base darker... | 3. ...or move it towards the right to make the base lighter. |
| Have fun! | ||
| << back to tutorials | ||
 dolls
dolls  bases
bases  resources
  tutorials
  contest
  links
links  doll maker
  faq
faq  about
about  forum
forum  guestbook

