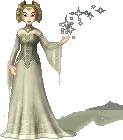
| Although I don't use Paint much, when I do, the most annoying thing for me is the lack of colours. With that in mind, I have written this quick tutorial on making and saving colour palettes to use on future dolls. |
||
 |
 |
 |
| 1. Double click on any of the colours in the colour palette. It doesn't matter which one as we are just using this to get into the Edit Colours screen. | 2. On the Edit Colours screen, click on Define Custom Colours | 3. Move the cross-hair around the until you like the range on colours showing on the bar on the right hand side of the screen. |
 |
 |
|
| 4. Press the ALT + Print Screen keys on your keyboard to take a screen shot of the palette. | 5. Click on Cancel to go back to your canvas. Go to Edit/Paste or press CTRL+V to paste the screen shot onto the canvas. If you receive a message that the Image is larger than the Bitmap, click on OK to resize. |
6. Now we just need to neaten it up & crop the edges. Your image should still be selected, so just drag it so that the palette is flush against the top and left margins, getting rid of any grey. |
 |
 |
 |
| 7. Click on any of the other tools & hover over the little dot on the bottom, right-hand corner of the canvas. | 8. An resize cursor should appear. Click & drag the canvas edge inwards & upwards... | 9. ...until it is right against the palette. Let go of the edge. |
 |
||
| Your first palette is complete! I suggest saving this as a BMP with a useful name (like a description of the colour) in a folder devoted to palettes so you know where they are when you need them. | ||
| << back to tutorials | ||
 dolls
dolls  bases
bases  resources
  tutorials
  contest
  links
links  doll maker
  faq
faq  about
about  forum
forum  guestbook

