|
Please note: These are just my ways of pixel shading. I readily admit that I'm not the world best pixeller, so there may be easier/quicker ways to do what I am doing, feel free to play around!
This tutorial is not written for any particular application. It can be followed in MS Paint, Ultimate Paint, PhotoPlus, PhotoShop, Paint Shop Pro or any other paint application you may use. It does assume that you are familiar with your chosen applications basic tools. |
||
 |
|
|
|
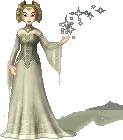
1. Bodice's are useful pieces of clothing. You can use them as a top for a skirt, or to add interest to a dress. It really helps to add detail to your dolls.
I am going to be using a prep base for this tutorial. If you're a beginner, I'd recommend using a similar sized base until you get the hang of the technique. |
2. I have only provided a few palettes for this tutorial. I am using a 6 colour palette. I have some more on my Palettes page, but feel free to use your own! | 3. Using the darkest (the 1st) shade of your selected colour, draw in the outline of the bodice. You have various options of the shape of the top and bottom of it - experiment until you find one you like. |
 |
 |
 |
| 4. Use the 3rd colour from your palette to draw in the boning of the bodice. Try to curve the lines with the body. | 5. Use the 2nd colour to draw in the first layer of shading. I have drawn it under the bust and around the waist. | 6. Use the 3rd colour from your palette to expand upon the shading, adding it around the sides of the bust and towards the bottom edge. |
 |
 |
 |
| 7. Use the 4th colour to fill in any remaining areas on the left and right panels. Expand the shading in the centre panel, adding some to the top edge of the bodice. | 8. Use the 5th colour to shade in most of the unshaded areas of the central panel. | 9. Use the 6th colour as a highlight on the areas of the bodice that would catch the light. |
 |
||
| Your bodice is complete! | ||
| << back to tutorials | ||
 dolls
dolls  bases
bases  resources
  tutorials
  contest
  links
links  doll maker
  faq
faq  about
about  forum
forum  guestbook


