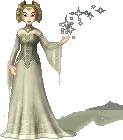
|
Please note: These are just my ways of pixel shading. I readily admit that I'm not the world best pixeller, so there may be easier/quicker ways to do what I am doing, feel free to play around!
This tutorial is not written for any particular application. It can be followed in MS Paint, Ultimate Paint, PhotoPlus, PhotoShop, Paint Shop Pro or any other paint application you may use. It does assume that you are familiar with your chosen applications basic tools. |
||
 |
|
 |
|
1. This is a really easy tutorial showing how to add a decorative edging to a long skirt or dress.
Start with your completed skirt or dress. |
2. I have only provided a few palettes for this tutorial. I am using a 6 colour palette. I have some more on my Palettes page, but feel free to use your own!
To make the edging look really shiny, choose a palette with quite a large difference between each shade. |
3. Using the darkest colour of your palette (colour 1) draw over the bottom edge of the skirt. |
 |
 |
 |
| 4. About 3 pixels above the line edge (make it higher or lower, depending on how wide you want the edging), mirror the bottom edge. Ensure the lines stop and start in the same place as the corresponding lines along the lower edge. |
5. I am using 2 different colours to make it look a little more interesting, but you can just use one colour.
Whichever you choose, fill the gap between the 2 lines with the darkest palette colour. |
6. Using the dress as a guideline, use the 2nd palette colour to start adding some highlight. |
 |
 |
 |
| 7. Continue onto the outward fold with colours 3 and 4... | 8. Use colour 5 to complete the highlight on the outer folds. | 9. To make the edging looks extra shiny, use colour 6 in the centre of the biggest outward folds, or wherever the light would catch. |
 |
||
| Your edging is finished! | ||
| << back to tutorials | ||
 dolls
dolls  bases
bases  resources
  tutorials
  contest
  links
links  doll maker
  faq
faq  about
about  forum
forum  guestbook


