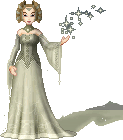
| The vast majority of bases available online are saved as .gif files. The problem with gifs is that they are limited to a 256 colour palette on a single layer, so before you are able to use all the neat features in PhotoPlus 5, your have to get the base to a point where it's millions of colours & on a layer all of it's own! | ||
 |
 |
 |
|
1. Save the base from the base creator's site by right-clicking on the image & choosing Save Picture As.
If you use a lot of bases from different sites, it's probably worth saving them into different folders with the base creator's name so that you don't forget who made which. |
2. Open PhotoPlus 5.
Open your saved base. If the base was saved as a transparent gif, the image will have a chequered background, indicating transparency. |
3. If the base creator cropped their image, it's probably a little small to work comfortably on.
To correct this, go to Image/Canvas Size. You may need to play around with the sizes depending on the size of the base. As a general rule, I like to leave myself with about 50 pixels around each size. Click on OK to action the changes. |
 |
 |
 |
| 4. Your base should look something like this. |
5. I always prefer to work on a doll with a white background, I find the little grey & white squares a little distracting.
Create a new layer underneath the base layer called Background. |
6. Click on the Flood Fill Tool.
Set your Foreground colour to white by setting R, G & B (Red, Green & Blue) to 255. |
 |
 |
|
| 7. Flood Fill the background layer with white. |
8. Now, we want to save this base in a format that will keep the layers so that we don't have to do this again.
Go to File/Save As. The file type PhotoPlus Pictures (*.SPP) is selected default. This is fine as it is the native image format & will preserve layer information. Give your image a name & press Save. |
|
| Your base is now ready for use! | ||
| << back to tutorials | ||
 dolls
dolls  bases
bases  resources
  tutorials
  contest
  links
links  doll maker
  faq
faq  about
about  forum
forum  guestbook

