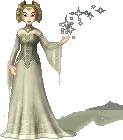
| The patent on the compression used for gif images expired recently, so free graphics applications can now include it without having to charge people! Because of this, you'll need to make sure that your copy of PhotoPlus 5 was downloaded after June 18 2004. If not, uninstall it & download again. |
||
 |
 |
 |
| 1. Open the image that you want to save as a transparent gif. |
2. We are going to merge the layers, so make sure your original is saved out of the way.
Go to Layers/Merge All |
3. On the Layer Manager, you should see that all the layers are now merged into 1 single Background layer. |
 |
 |
 |
| 4. Right-click on this layer & choose Promote to Layer. | 5. Select the Color Selection Tool. |
6. Click on the background of your doll to select it, then press DELETE on your keyboard. Little grey & white squares will show in the areas deleted, indicating transparency.
Repeat this for any little nooks & crannies on the doll. |
 |
 |
 |
| 7. You may find it helps to zoom in on the image to see what you are doing. |
8. Press CTRL+D to drop the selection.
Your dolls background should be looking something like this. |
9. Go to File/Export Optimizer....
Use the following settings:
|
 |
||
| Your doll is now a transparent gif! | ||
| << back to tutorials | ||
 dolls
dolls  bases
bases  resources
  tutorials
  contest
  links
links  doll maker
  faq
faq  about
about  forum
forum  guestbook

