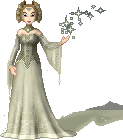
| Although I have written this tutorial for Paint Shop Pro, any program that support layers, like Adobe Photoshop, Serif Photoplus, Corel Photopaint or Ulead PhotoImpact, can be used. It does assume that you are familiar with whichever graphic program you are using. | ||
 |
            |
 |
| 1. Start with your completed doll that you want to add the stockings to (or just a base if you prefer adding them first). | 2. I have created several colour palettes that you can use, but you are free to use your own colours, or use on of my other palettes. I have labelled the colours on the palettes to make them a bit easier to pick. | 3. It's not really necessary, but if you want to, create a new layer. Select the darkest colour from the palette you are using & line the dolls legs. At the top, make the line curve, as if it was curvy around the shape of her leg. |
 |
 |
 |
| 4. Still using the same colour, draw in stripes down the leg, each 2-3 pixels wide, leaving about the same size gap between each one. Again, don't make it just a straight line, curve it slightly. | 5. Flood Fill the space in between each stripe with the darkest shade from the grey palette. | 6. With the medium and lightest shades from the colour palette, add shading as shown above. |
 |
 |
 |
| 7. Repeat this process with the medium and lightest colours from the grey palette. | 8. Your doll should now look something like this. | 9. To complete the look, just add some wings! |
 |
||
| Your stockings are complete! | ||
| << back to tutorials | ||
all content © copyright amy roberts 2001-2007 (unless otherwise stated)


