 |
 |
 |
| 1. Start with the doll you want to add the top to. | 2. Create a new layer called "Top". Set your foreground colour to a darker shade of whatever colour you want the top to be. Draw in the top using the base's edge for guidance. | 3. Using the Paintbrush & Eraser Tools, clean-up the outline of the top. Ensure it is 1 pixel thick at all points & looks smooth. |
 |
 |
 |
| 4. Flood Fill the interior of the top with a lighter shade of the outline colour. | 5. Select the Retouch tool & use the approximately the same settings as shown above - this will need to vary depending on the size of the doll. | 6. Start by darkening the sides of the top. Use light strokes, don't keep the mouse button held down or it will be too dark. |
 |
 |
 |
| 7. Move onto the bust region. Don't just shade under the bust line, shade over & up the sides to give shape. | 8. Next, do the arms. This is just the rough shading, we'll add details in a moment. | 9. If needed, increase the Size of the Retouch Tool a little & blend in the sides/torso area of the top. |
 |
 |
 |
| 10. Decrease the size of the tool down to 1. Add some creases around the elbow & under the arms. | 11. Add some creases to the bust area. | 12. Finally, add some creases around the sides of the top. |
 |
 |
 |
| 13. Amend the settings to those shown above. | 14. Wherever there is a small, darkened crease, use the Retouch tool to lighten the area just above it. This will give the fold a more 3D look. | 15. Increase the size of the tool to about 6. Lighten the opposites sides of the arms that we darkened in step 8 & add some overall highlight to the bust area. |
 |
||
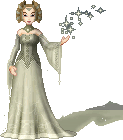
| Your top is finished! | ||
| << back to tutorials | ||
all content © copyright amy roberts 2001-2007 (unless otherwise stated)


