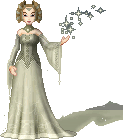
| Although I have written this tutorial for Paint Shop Pro, any program that support layers, like Adobe Photoshop, Serif Photoplus, Corel Photopaint or Ulead PhotoImpact, can be used. It does assume that you are familiar with whichever graphic program you are using. | ||
|
NOTE We are going to be using a Plug-in for this tutorial. Before you begin, you will need to download the Cloud filter from MuRa Filter Meister. It's completely freeware & lots of fun. If you have not used Plug-ins before, I strongly recommend you read the Introductions to Plugins for beginners at The Plug-in Site. It also offers information on installing plug-ins. |
||
 |
 |
 |
| 1. Start with the blank base you are going to use. I am using a Mina base for this tutorial. For a smaller base, you may need to decrease the brush sizes. Create a new layer called Dress. |
2. Select a dark shade of the colour you want the dress to be. For this tutorial, I am using #391313. Using the Paintbrush tool. Because velvet is a fairly heavy fabric, don't make the dress too "foldy". A few round curves should be sufficient. | 3. I tend to make a fairly rough outline to begin with & then go about cleaning up the edges with the Paintbrush & Eraser tools. Zoom Out often to make sure the lines of the dress look ok. |
 |
 |
 |
| 4. It is worth taking your time to make the outline of the dress as good as it can be. It can be fixed later, but it's a lot easier to do now. Try and make the outline no more than 1 pixel thick at all points. | 5. Select a slightly lighter shade of your outline colour (I am using #572121 and fill in any gaps in the dress. Here, for instance, where the hands are on the hips, I haven't used the outline colour as it is too dark. | 6. Flood Fill the interior of the dress with your selected colour. |
 |
 |
 |
|
7. Select the Magic Wand tool and set the Tolerance quite low - about 10. Click on the interior of the dress to select it.
Hint: If your areas on your dress don't touch & you want to select them at the same time, hold down SHIFT while using the magic wand. All areas you click on will be selected. |
8. Go to Effects/Plug-in Filters/Mura's Meister/Cloud... (if you don't have this, see my note at the top of the page). Set the FG colour to the colour of your outline. When you click on the little block of colour, a colour wheel will appear with the colour picker cursor. Use the colour picker to select the outline colour on your dress. Set the BG colour to a ligher shade of the outline - I am using #CC0808. The Light can stay white, or you can change it to a very light shade of your outline colour. |
9. Now, this bit may require some experimentation depending on the look you want! These are the settings that I use, but please play around to see what effects you can make. |
 |
 |
 |
| 10. Your doll should be looking something like this so far. | 11. Click on the Retouch tool and use the settings shown above. For a smaller base, make the Size and Opacity a little lower & vice versa for a larger base. | 12. These next few steps require a lot of patience! Zoom out often & keep an eye on the shading. Start by darkening the obvious areas of shadow - the dress folds, the torso, under the arms. |
 |
 |
 |
| 13. Increase the brush Size up to about 20 and slowly go over the whole of the dress to add contrast. Take it easy, you don't want to over-do it. | 14. Decrease the brush size down to about 2 pixels. Use the Retouch tool to detail the folds on the sleeves (if you dress has sleeves!) and on the bust area. | 15. If your dress is looking a bit too light, go to Colours/Adjust/Gamma Correction... and move the sliders towards the left to darken the dress. |
 |
||
| Your Dress is complete! I've found that this dress is wonderful to use with from Harry's Filters Colorize & Add Color filters. As always, play around & experiment until you find something you like! |
||
| << back to tutorials | ||
 dolls
dolls  bases
bases  resources
  tutorials
  contest
  links
links  doll maker
  faq
faq  about
about  forum
forum  guestbook

