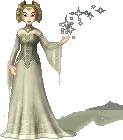
| Although I have written this tutorial for Paint Shop Pro, any program that support layers, like Adobe Photoshop, Serif Photoplus, Corel Photopaint or Ulead PhotoImpact, can be used. It does assume that you are familiar with whichever graphic program you are using. | ||
 |
 |
 |
| 1. Start with the completed doll that you want to add the stockings to (or just a base if you prefer adding them first). I always draw the hair last. | 2. Select a colour that you want for your hair. We are only going to be using 1 colour & then the retouch tool, but here are some to get you started. | 3. Select the Paintbrush tool & draw in your hair. You'll notice that I'm not adding any outlines to the hair - this really is a quick & easy technique. Ensure that you've added some "waves" to the edge of the hair. I always find it easier to Zoom in & out a lot while doing this to make sure that the shape is ok. Sometimes it looks greater up close, but doesn't fit the shape of the head when you get further away. |
 |
 |
 |
| 4. Click on the Retouch tool & use roughly the settings above. You'll need to amend slightly for different sized bases. | 5. Start by shading the parting, around the neck & anywhere the hair goes behind the doll. | 6. Next, shade the hair along the edge, where it goes "in" |
 |
 |
 |
| 7. Add some shading opposite the bits that go "out" | 8. Change the retouch mode to Smudge as use the settings above. | 9. Smudge the shading a little to give the impression of strands of hair. |
 |
 |
 |
| 10. Change the retouch mode to Lighten RGB and use roughly the above settings. | 11. Lighten the top section of hair... | 12. ...then lighten the waves that go "out" |
 |
 |
 |
| 13. Use the same settings as step 8 and smudge the lightening a little into strands. | 14. These last 2 steps are optional: keep the settings from above, but drop the Opacity down to 40%. Smudge the hair over the shoulders in an "S" shape. Becuase the opacity is set so low... |
15. ... you will need to go over it quite a few times in the same pattern to get the effect you want. |
 |
||
| Add a little shading around the face & neck if you want, & you're done! | ||
| << back to tutorials | ||
 dolls
dolls  bases
bases  resources
  tutorials
  contest
  links
links  doll maker
  faq
faq  about
about  forum
forum  guestbook

