| Although I have written this tutorial for Paint Shop Pro, any program that support layers, like Adobe Photoshop, Serif Photoplus, Corel Photopaint or Ulead PhotoImpact, can be used. It does assume that you are familiar with whichever graphic program you are using. | ||
 |
            |
 |
| 1. Open the base you want to use. If you are using a base of a different size to this, you may have to adjust some of the settings slightly. | 2. I have created several colour palettes that you can use, but you are free to use your own colours, or use on of my other palettes. I have labelled the colours on the palettes to make them a bit easier to pick. | 3. Use the Dropper tool to select the darkest shade from the palette. Using the Paintbrush, draw the outline of the dress. I'm not really going for realism here, more the illusion of wind. As you can see, the dress is flat down one side & flows out of the other, with a nice wavy bottom. |
 |
 |
 |
| 4. Use the Eraser & Paintbrush tool to smooth out the outlines making sure it is 1 pixel thick at all points. It always helps to Zoom in to do this & Zoom out to check how the lines are looking. Sometimes they looks really smooth & prefect up close, but fairly rubbish at the normal size. | 5. Using the middle palette colour, Flood Fill the interior of the dress. You may need to go over any gaps first (like where the hands overlap the dress in this example). | 6. Click on the Magic Wand tool. Click on the area outside of the dress. When this is selected, go to Selections/Save to Alpha Channel. Click on OK and, on the New Channel screen, type in Dress Outline as the selection name and click OK. This is will save the selection and we won't have to keep selecting it again. |
 |
 |
 |
| 7. Create a new layer called Folder Shading. Select the Airbrush tool & use these settings (you may need to adjust these for a larger/smaller doll) | 8. Using the darkest palette colour, draw on the doll where the shading of the folds would be. Generally, the bits that curve "out" are going to be shaded & the bits that curve "in" are going to be highlighted. Don't worry if you go over the edges. | 9. Select the Retouch tool & use roughly the settings as shown above. Again, adjust them for the size of your doll. |
 |
 |
 |
| 10. Now we have to smudge! It takes time to get the right effect, so I'm going to spend the next few steps just showing the stages of the shading. I generally start by smudging upwards, then downwards a little to smooth out the shading. |
11. Continue in this way, smoothing out the shading. Zoom out frequently to look at the folds to see which bits need work. | 12. You may find that you need to increase or decrease the size of the brush as you go along i.e. increase it for smudging the bottom part of the folds & decrease it for smudging the more delicate top ends. |
 |
 |
 |
| 13. If it's difficult to see what you're doing because of the smudging that goes over the edges, go to Selections/Load from Alpha Channel and load the selection you saved earlier. | 14. Press Delete on the keyboard & anything within the selection should be removed. Press CTRL+D to drop the selection. | 15. I'm still not quite happy with the folds, so I'm going to smudge them some more... |
 |
 |
 |
| 16. ...& then delete the excess shading as I did in step 13 & 14. | 17. The rest of the dress is looking fairly flat, so we need to add some shading there. Create a layer named Dress Shading &, either with the Paintbrush or Airbrush tool, draw on the shading. | 18. Use the Retouch tool with the same setting as before, only drop the Size down to about 5 & smooth out the newly added shading. |
 |
 |
 |
| 19. Delete the excess shading & have a look at your doll. If it needs more "smoothing out"... | 20. ...continue smudging. | 21. Repeat the process of smudging, deleting excess smudge, reviewing shading until you are happy with the final effect. |
 |
 |
 |
| 22. Create a new layer called Folds Highlight. Using the lightest colour of the palette & the Airbrush tool, as before, draw in where the highlight would be on the folds. | 23. Smudge this highlight as you did with the shading until you are happy with the results. Take you time & review your shading often. | 24. Create a new layer called Dress Highlight. Using the Paintbrush tool, draw in where the highlight should be on the rest of the dress. |
 |
 |
 |
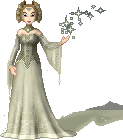
| 25. As with the dress shading, smudge the highlight until you are happy with the results. I usually drop the Size of the brush down to about 2 to do the delicate smudging bits. | 26. We're almost done now! Create a new layer, beneath all your dress layers called Underneath Shading, or something to that effect. Using the darkest palette colour & the Paintbrush tool, draw in where the fold of the dress would be visible from underneath. | 27. Your dress should now look something like this. |
 |
||
| Just add some hair & accessories & your dress is complete! | ||
| << back to tutorials | ||
all content © copyright amy roberts 2001-2007 (unless otherwise stated)


